Monday, March 31, 2008

Mexican Chicken

I absolutely love this recipe ... all credit must go to Paula Deen though, for it is one of "her recipes". This is another one of those "all inclusive" meals ... serve with a salad and some type of bread and you've got a meal! Very tasty!

Mexican Chicken

ingredients:

1 pkg of chicken
1 can of Cream of Chicken
1 can of Cream of Mushroom
1 can of Cheddar Cheese Soup
1 can of Rotel (Original)
1 pkg of Soft Tortillas
1 bag of Cheddar Cheese

directions:

step 1 - wash, season and boil chicken (I use salt, pepper, onion, and Emeril's Essence)

step 2 - cut into small pieces

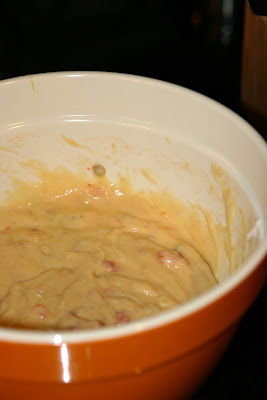
step 3 - in a large bowl, combine cream of chicken, cream of mushroom and cheddar cheese soups. Add Rotel and mix thoroughly.

step 4 - add in chicken
step 5 - in a Pyrex dish, butter entire dish including sides

step 6 - layer soft tortillas (I always tear them into small pieces and place around to cover the entire bottom of the dish ... this way when you go to serve it, you won't have to cut it, you'll be able to spoon it out (very handy).


step 7 - layer chicken/soup mixture

step 8 - layer soft tortillas

step 9 - continue this layering process until all of chicken/soup mixture is used.

step 10 - make sure top layer is soft tortilla pieces


step 11 - add cheddar cheese


step 12 - at this point ... if you are making ahead of time - cover and refrigerate until needed. Or, if ready to prepare - bake 30 minutes in 350 degree oven. I keep aluminum foil laid across the top of my dish until about 5-10 minutes before dish is finished - so the cheese doesn't get too done.

once again ... I opted to make this dish ahead of time and served it at a dinner the next day - thus the reason for no pictures of the final result!


comments: YUMMY!!!! I love me some Mexican Chicken! Very good dish ... I used to make it so often that Nathan banned it from the kitchen for a while! ha! Another thing that I like to do ... instead of layering in a Pyrex dish ... I use about 12 of my small "single serving" baking bowls and layer all 12 of them individually ... and then put up in the fridge/freezer and when company comes or I need a "quick meal" - you have a single serving ready! All the same steps are required ... oven requirements are the same and I use the types of bowls that can go in the fridge, freezer, oven and dishwasher ... so it goes straight from the fridge to the oven! Very handy! And very good!


rating: 4.5

Taco Bake

This recipe is a variated version of the original recipe that was given to me by my aunt last year ... the reason it's variated, is because I lost the recipe and wanted to make it, so I did my own thing ... I think it turned out better (no harm done - it wasn't her recipe, she was just passing it along). A very good recipe for dinner parties or when you need a good appetizer dish!


Taco Bake


ingredients:

1 to 1 1/2 lb hamburger meat
1 pkg of taco seasoning
1 large can (1 lb) of refried Beans
(2) cream cheese, softened
1 large jar of Picante sauce
1 large bag of Cheddar cheese


directions:

step 1 - cook and season hamburger meat with Taco seasoning ... I also do my regular seasoning of salt, pepper, onion and garlic.


step 2 - spread refried beans in the bottom of a pyrex dish or large baking dish


step 3 - layer cream cheese

step 4 - layer hamburger meat


step 5 - layer Picante sauce


step 6 - layer cheddar cheese


step 7 - at this point ... if you are making ahead of time - cover and refriderate until needed. Or, if ready to prepare - bake 30 minutes in 350 degree oven.

step 8 - serve with Tortillia Scoops

(I do not have pictures of the final product, because I opted to make this ahead of time for an event after church yesterday)

comments: This is a VERY tasty appetizer and I love the "cream cheese" in it as an alternative to sour cream. So very yummy, that I usually end up eating way too much! I would totally recommend this recipe. Another variation is to use Mexican Cheese instead of Cheddar.

rating: 4.5

Tuesday, March 25, 2008

Peanut M&M Cake

I love peanut M&M's ... so I had to try this ... and if you love peanut butter or peanut M&M's - you will like this recipe. It is so very simple to make and a great recipe to try if you want to give ordinary cake a little "kick".

Peanut M&M Cake

ingredients:

1 box of cake mix (chocolate or yellow) - (I used yellow butter)
1/2 cup flour
1 cup peanut M&M's
1 16oz vanilla frosting
1/4 cup creamy peanut butter
peanut M&M's to garnish


directions:

step 1 - preheat oven to 350 degrees.

step 2 - make cake batter as directed on back of box.

step 3 - stir in 1/2 cup flour


step 4 - add 1 cup peanut M&M's, mix well


step 5 - pour batter into a greased 9x13 inch pan/dish


step 6 - bake 30-35 minutes or until an inserted toothpick comes out clean


this was the bottom of the cake ... a lot of the M&M's settled on the bottom ... you could also flip the cake out of the pan before frosting ... then the top layer under the frosting would be a layer of M&M's ... mmmm

step 7 - allow cake to cool completely


step 8 - mix frosting and 1/4 cup peanut butter together


step 9 - frost "cooled" cake and garnish with peanut M&M's


comments: a simple, fun cake to make ... I loved biting into a "surprise" of peanut with melted chocolate all around it from the M&M ... the icing was also very nice - just the right amount of peanut butter added to the vanilla frosting. I think I would like to try this recipe again and make cupcakes.


rating: 3.5

Wednesday, March 12, 2008

Crescent Chicken Casserole

I've been wanting to try this one for a while ... it sounded so good to me ... and it was good ... and very easy to make ... however, LeAnna assisted me and got way too much cheese in the topping ... I'm sure if you follow the directions exactly, it won't be as cheesy of an experience as it was for us!


Crescent Chicken Casserole


ingredients:


1 8oz package of shredded Cheddar cheese, divided
2 chicken breasts, cooked and diced
2 (8-count) cans refrigerated crescent rolls
1 (10-3/4oz) can cream of chicken soup
1/2 cup milk


directions:


step 1 - boil chicken, season to your palate pleasing and dice


step 2 - preheat oven to 350 degrees


step 3 - butter casserole dish


step 4 - add 1/2 cup cheese to chicken and mix


step 6 - separate rolls, and spoon chicken mixture onto each roll


step 7 - roll up

step 8 - place in buttered casserole dish


step 9 - in a saucepan, melt together soup, cheese and milk


step 10 - pour mixture over rolls


step 11 - bake for 30 minutes in 350 degree oven


step 12 - remove and add remaining cheese and put back in oven to melt


step 13 - spoon out and serve!


comments: a very good dish ... but ... poor LeAnna, she wanted to help and made most of the dish -(with way too much cheese) but she had fun! It was very good, but I would like to variate and try some Rotel in the "mixture" - maybe next time!

rating: 3

Tuesday, March 4, 2008

Blender Chocolate Pie

Okay ... the name itself caught my attention. I have to agree with Nathan, there is not much difference in mixing it in a blender or in a bowl with a mixer ... but the novelty of using the blender to make a pie sparked my attention. This is a simple chocolate pie recipe that renders very good results!!! AND I got to do something different and use my blender to make a pie! I'm weird.


Blender Chocolate Pie


ingredients:

2 1/2 cups sugar
4-5 Tbsp cocoa
4 eggs
1 (12oz) can evaporated milk
1 tsp vanilla
1 stick butter, melted
1 (9-inch) deep-dish unbaked pie crust


directions:

Step 1 - preheat oven to 350 degrees

Step 2 - add sugar to the blender


Step 3 - add cocoa

Step 4 - add eggs


Step 5 - add evaporated milk and vanilla

Step 6 - add melted butter


Step 7 - blend well!

Step 8 - pour into unbaked pie crust


Step 9 - bake for about an hour or until center of pie is set. Mine had to cook about and hour and 10 minutes.


I cut the first piece while it was still warm (had to get this perspective - ha) so it did not have enough time to "set".


comments: oh my ... chocolate pie is one of my favorite desserts of all time ... so all the more reason to try this one! It is SO very good ... YUMMY SIN on a plate!!!!

rating - 4.5